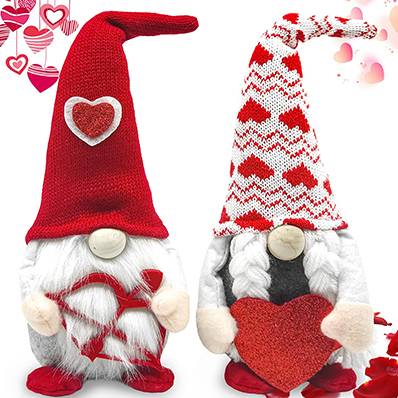
With Christmas trees decked in sparkling ornaments, festive tunes filling the air, and snow settling on rooftops, there’s one delightful figure that captures the essence of the season perfectly: the Swedish gnome. These charming little creatures, with their pointy hats and warm expressions, have transcended their native land to become a beloved part of festive decor worldwide. But what is the story behind these whimsical beings, and how can you craft one for your own home?
A Dive into History: Origins of the Swedish Gnome
In Scandinavian folklore, the Swedish gnome, or ‘tomte‘ as it’s traditionally called, is a protective household spirit. Dating back centuries, legends speak of the tomte as a caretaker of homes and farmlands, especially during the dark, harsh winters. These tales imbue the gnome with a dual role – of both protector and mischief-maker. If treated well, the tomte would safeguard the home, but if slighted, a flurry of harmless pranks awaited the household.
Over the years, these myths influenced the design and cultural significance of the gnome. Initially visualized as elderly, diminutive figures with long beards, today’s gnomes are a delightful mix of tradition and contemporary appeal, often characterized by their stout stature, rosy cheeks, and oversized hats.
Swedish Gnomes: A Global Affair
The appeal of the Swedish gnome isn’t just confined to Scandinavia. Around the world, these gnomes have been embraced and adapted to various festive traditions. In some regions, they’re seen as harbingers of gifts, akin to Santa Claus, while in others, they’re simply decorative elements that add a touch of whimsy and warmth. The universal charm of the gnome lies in its symbolic representation of protection, joy, and the simple pleasures of home.
Creating Your Own Swedish Gnome: A Step-by-Step Guide
Step 1: Gather Your Essentials
For one delightful gnome, assemble the following:
- Two distinct patterned fluffy socks (chenille works best)
- A plain sock for the structure
- A square piece of faux fur (roughly 4×4 inches)
- A tiny portion of skin-toned fabric
- Around 2.5 to 3 cups of rice
- Some pillow fill for stuffing
- Two elastic bands
- 8-inch long string or twine
- A 12-inch wire piece
To facilitate the crafting, ensure you have:
- A spoon or scoop
- A funnel
- Hot glue gun with glue sticks
- A pair of sharp scissors
- Precision knife and a cutting surface
- Ruler or tape measure
- A marker
- Sewing pins
- Sewing apparatus (machine or hand-stitching supplies)
- Pliers
Step 2: Building the Base
Begin by filling the plain sock with rice. Using a funnel simplifies this step. Secure the sock’s end with twine or string. It’s often easier to first use an elastic band and then wrap the twine around.
Now, carve out a small 2-inch diameter circle from the skin-toned fabric. Separate a small section of the rice-filled sock for the nose, envelop it with the fabric circle, and tie it off using twine.
Step 3: Crafting the Hat
Proceed to fill the sock’s remaining part with pillow stuffing. Stitch this portion into a conical shape – this forms the gnome’s hat. Pins might be useful here for alignment. Whether you prefer machine-stitching or hand-stitching, ensure it’s secure. Once done, use hot glue to fix the hat firmly onto the body.
Step 4: Dressing the Gnome
Time to dress your gnome! Slice the fluffy sock just above the heel and slide it over the rice body, ensuring it sits snugly beneath the gnome’s nose.
Step 5: Furry Finishing Touches
For the beard:
- Decide on its length and width.
- Draw the beard dimensions on the faux fur’s reverse side.
- Use the precision knife to cut out the beard shape. Avoid scissors to preserve the fur’s texture.
- Adhere the beard onto the gnome using the hot glue gun, ensuring you only glue along the top edge.
Step 6: Final Hat Placement
For the crowning touch:
- Insert the wire through the hat, ensuring it runs top to bottom.
- Bend the top wire into a loop to avoid any sharp edges.
- Pull a fluffy sock over this wire and cone structure.
- Neatly fold the sock’s edge twice and glue it securely to the underlying sock.
Step 7: Welcome Your New Gnome Friend!
Congratulations! Your charming Swedish gnome is now ready to grace your festive setting. As you get acquainted with the process, you can swiftly craft an entire gnome family. Get innovative with braids for female gnomes, mustaches, and even additional embellishments. The sky’s the limit in personalizing your gnome clan!
Incorporating Gnomes into Modern Decor
Swedish gnomes can elevate your festive decor, fitting seamlessly into various themes. For a classic look, pair them with rustic ornaments, wooden accents, and traditional Christmas symbols. For a modern touch, juxtapose your gnome against geometric patterns, metallic elements, or monochromatic color schemes.
The Tapestry of Festive Traditions
While Swedish gnomes are delightful in their own right, they’re a single thread in the vast tapestry of Christmas and festive traditions. From the Germanic ‘Nutcracker’ to the British ‘Christmas Crackers,’ global traditions remind us of the season’s unifying spirit.
In Conclusion: The Enchantment of Swedish Gnomes
Swedish gnomes are more than just festive decor. They’re a symbol of warmth, protection, and the magic of the season. As you deck your halls, consider giving these charming creatures a spot by the fireplace or the Christmas tree. Let them serve as a reminder of the simple joys, the magic of traditions, and the warmth of home.
Note: Always ensure that your creations and interpretations are respectful to the origins and significance of the Swedish gnome. Embrace the tradition, adapt with creativity, and most importantly, spread the festive cheer!